Tuesday, November 8, 2011

Night In The Tent Part Deux

Since Ed and I see things differently I want to add my bit about the tent, sleeping bag, my pillow, padding, and the cold.  He really was going to go on this trip with a lesser tent, one that was used by our boys in Scout camping here in Oklahoma and he probably would have been OK.  Not necessarily comfortable, but OK.  Then he invited me along, and I was given this piece of advice from a friend who is a big camper “Get a good tent.  It’s one thing you don’t want to skimp on.”  Thought on that for about three seconds and realized he was right. 

Which made me think: what did we do before Google?  Ed and I did TONS and I mean TONS of research on tents and other camping gear.  I’m not convinced this endeavor would have been this successful without our beloved Google.  When we narrowed it down to the Agnes and Marmot it then became a question of:  

 Do we want more space and to be able to stand up?  Or would we like one that is really waterproof and easier to set up?  We are not tall, one of the 1st times in my life that being short is an advantage.  We have also been married for 18+ years, so we don’t mind snuggling either.  For us the Big Agnes Big House 4 was a luxury we didn’t really need. 

For me there was no question.  The dryer I am, the warmer I’ll be, and then Ed will have a happier Devon.  The world will keep turning and all will be super, duper happy.  Maybe not the rest of the world but certainly Ed’s world will be happier.   We also opted for easier set up because in our minds a worst case scenario would be pouring rain and we NEED to get the tent set up NOW!  The Marmot Lime 3P is a backpacker’s type tent so it is meant to be light weight, sturdy, and fast set up.  The bonus was the lower price.  But, and it’s a big but here, we would have paid the higher price.   We will be saving money by camping, most area’s average $30 a night rather than using hotels which tend to cost around $150 a night so spending money on a good tent is a good investment.

As for the sleeping bags Ed did all the research on that one.  I trusted him, he ordered the Pureland Track300 and when they came and I unrolled them my first thought was ‘why oh why did I trust him!’  The bags seemed AWFULLY thin.  The packaging said it was rated to 0 but I wasn’t so sure.  After about 2 min. of crawling in that night I realized that these really were going to be great.  I loved the mummy bag and the way it hugged my head.  I also loved and I mean really LOVED the flap that came down around my neck.  It kept the heat in and made a huge difference in comfort for me.

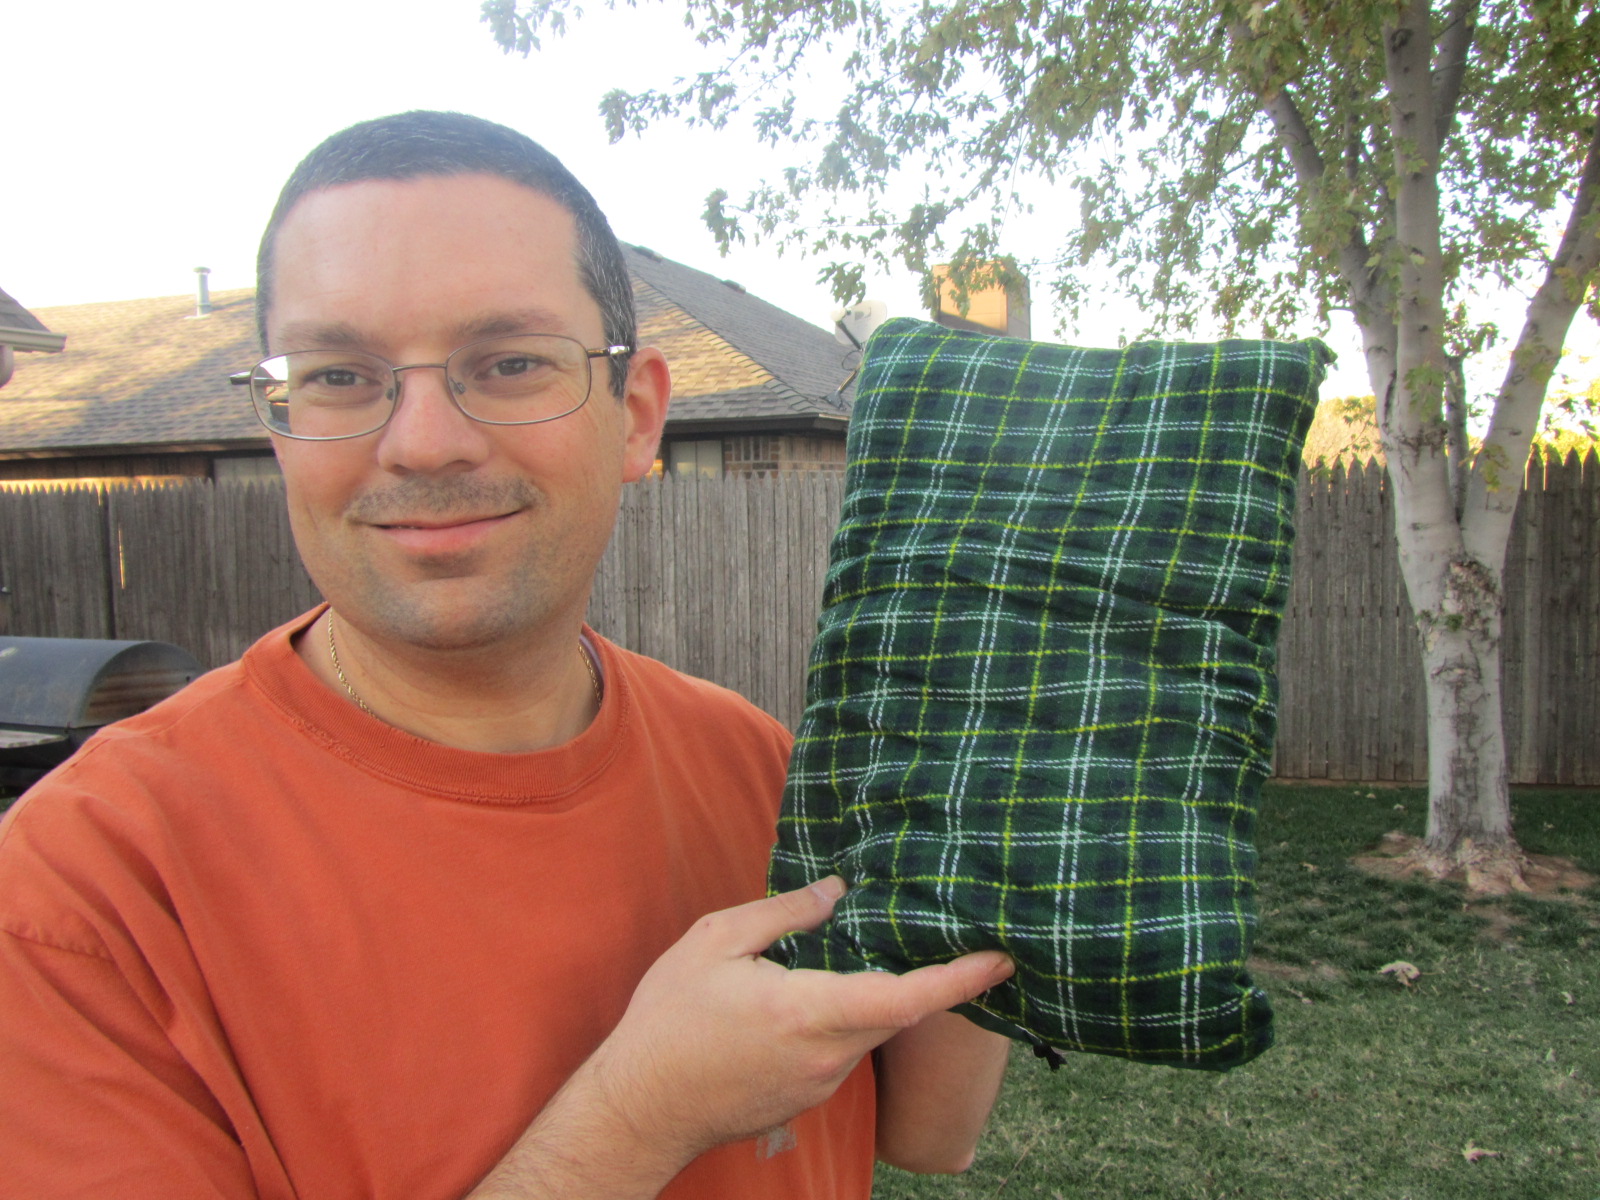
Devon's pillow.  This side is the fleece side.
Now two things I was not happy with.  My 1st problem was my pillow.  Now it was a great size.  It fit in my and around my bag and could be condensed into a small sack.  We purchased this from our local sporting goods store and didn’t pay attention to the brand or cost.  I know it wasn’t more than $5.00.  The front was a nice warm fleece and the back was made of nylon.  I laid the nylon side down so I could rest my head on the warm fleece.   This didn’t seem too bad until I would move and the pillow would shoot out from under my head.  After about the third time I knew this was going to really bother me and rather than unzipping my bag and trekking back into the house I texted my oldest and had him bring me out my pillow.  I discovered I really like having a butler while I camp. 

To solve my slippery pillow issue I plan to sew over the nylon with a fleece backing.  This should keep my pillow in place and keep it from escaping. 

 
He rides a bike, and cuts off pillow tags.  I married a rebel.


Devon's pillow is the green bag.  Folds up quite nicely.
Next, I found that I am a princess.  By morning both my left and right hips were in pain.  I am a side sleeper and the pad we had bought was not good enough.  We had bought the ALPS Mountaineering Lightweight Series Self-Inflating pad for our trip.  Also, I noticed that the cold from the ground tended to seep through the tent floor and my bag.  Ed said it didn’t bother him but what does he know, he has an internal temp of 115 F!  See I’m a princess.  We have since ordered a new pad in hopes this will keep out the cold and solve my hip pain.  Same company just the XL size.  This one is 30”x 77”x 3” and it is considered the ‘choice for luxury camping.’  Princess Devon should now be more comfortable at night.  Maybe I can pack my butler and order him to bring me chocolates in bed too. 

My advice:  GO GOOGLE.  Make a list of what you want.  What extra amenities are you willing to live without?  What amenities do you absolutely need?  Read the reviews.  But remember that there is always someone out there that will whine about anything and everything; rather look for common complaints in the reviews.  Also, go to several websites selling that item and read the reviews on those sites as well, and then compare.  This will give you a clear picture of the item you are purchasing.  If you are able test it out before you go I suggest you do it.  After all, wouldn’t you like to find out it doesn’t really work the way you want it to close to home rather than out in the great outdoors where you’re stuck with it? 

Remember I am not a camper.  This is our 1st time in our 18+ years of married life we will be camping and for me this is the 1st time in 25+ years I’ve camped.  I really think I’ve got the pillow issue fixed and if we can solve the padding and cold seeping up from the bottom I can see me liking this.  Have an open mind and a willingness to try is the key here and it will lead to an awesome adventure. 

Sunday, November 6, 2011

New Digs!

We’d like to give a great big shout out to my good friend J.K.  LOVE the new design.  LOVE IT!  She obviously has way more computer know how than Ed or I.  

I met J.K. when I was 10 or 11 (so long ago I can’t really remember the exact age) and she’s been a friend ever since.  When she offered to spruce up the joint I jumped at the offer and boy am I glad I did! 
Thanks J.K.  You’re the best.  

I'm working on my tent/sleeping bag/pillow review, just give me a day or two to get it done. 

The sleeping gear

Good morning, Ed here.

Gear selection is going to be one of the most important parts of the trip.  Gear can make the difference between being well rested happy people who are having the time of their lives and the most miserable crabby people you have ever met.  Since we prefer to be well rested, happy, and have the time of our lives, we are trying to make wise selections with our gear.  Today, let's talk about sleeping gear.  To give different perspectives on the gear, I will write my thoughts and Devon will write hers. 

Normally, we like to compare shop and look at multiple sites when we are looking to purchase items.  For the sleeping bags, pads, and pillow (we bought one at the local Academy Sports store), we went to Amazon.com.  My parents gave me a gift card to Amazon for my birthday this year, so we used it for some of the gear.  Amazon.com is an amazing site where you can purchase just about anything you can think of from multiple vendors.  Most of the time, you can get good prices here as well.

For the pads, we went with the ALPS Mountaineering Lightweight Series Self-Inflating Air Pad.  We went with the long pad which measures 25"X77"X2" per the manufacturer.  In reality, I don't think it is 2 inches thick, more like an 1.5 inches.  These pads weigh 3 pounds 15 ounces when packed, so they are very light weight.  For me, the pad worked just fine.  I found it quite comfortable and could not feel the cold bleeding through the bottom of the sleeping bag.  The pad is self inflating with a twist valve at the top.  It inflates fully in about three minutes.  I did find that I had to give it a few extra puffs to firm the pad up a little before settling down for the night. The pad rolls up tightly and measures 6.5"X 26" when rolled up, so it will stow nicely in our trailer.  Here are some photos of the pads:

Here is one of the pads rolled up in its bag.  The two rolled up items above the pad are our camp pillows
Here it is in the tent.  I have not opened the air valve yet, so it has not started to unroll.
I unrolled it a little and opened the air valve.
A close up of the air valve.
The pad self inflating.
These pads fit perfectly side by side in our tent. I thought I had a photo of it fully inflated, but I do not. 
Now that we have a nice comfy pad to sleep on, let's take a look at our pillows.  We purchased Devon's at the local Academy Sports store when it was on sale.  She will share her thoughts about her pillow in a later post.  My pillow was ordered on Amazon.com.  I went with the Columbia Cloud Haven Packable Fleece Pillow. 

What I liked about this pillow is that it has a self contained stuff sack and it rolls up quite compactly.  It also fit nicely in the hood of my mummy sleeping bag.  The problem with it is that it is very thin and does not provide much support.  I found it quite uncomfortable and woke up a few times at night due to neck pain.  I am not going to bring this pillow on our trip and plan on giving it to my sons to use for their Scout camping trips.  I plan to sacrifice some space in our trailer and purchase a regular pillow and pillow case from Walmart to use.  However, if you have any recommendations, please post a comment or send us an email.  Here are some photos of the pillow:
 
Here I am opening the pillow stuff sack.
Here it is unpacked.  It does have a nice and soft fleece cover, but it is simply not going to work for me.
 And now for what I believe is one of our best purchases so far, our sleeping bags.  We went with the Pureland Track300 -8 C / 17 F Mummy Sleeping Bags.


These bags are excellent.  They are rated to 17 F degrees which will be more than adequate for our trip.  During our test, they worked quite well.  They warmed up quickly and we were very comfortable all night long.  The bags stuff down to a very compact size in a compression sack and weigh in at 5 pounds each.  The interesting thing about these bags is that they are not bulky at all and feel thin.  We were a little skeptical at first because they seemed so thin, but we were quite impressed with how warm they are.  One thing to note with these bags, they can be zipped together to form one large two person bag which could come in handy for those extra cold nights ;-).


The bag stuff easily into the compression sack. 
Ahh, warmth and comfort.
There is a flap secured with Velcro to seal the cold out by the zipper.  There is also a zipper at the foot end of the bag that you can unzip to get a little air flow at your feet if it gets to hot in the bag.  We did not test the zipper at the foot of the bag.
There is a nice bib flap on the inside of the bag which seals the cold out from around your neck.

It also has a draw string that you can pull to seal the hood around your head.
I'm ready for the cold nights ahead.
Welcome to our home on the road!
Over the next few weeks we will be posting reviews and information about additional gear we have purchased as well as some bike prep posts.  


Next week, we will learn how to make a very light weight and efficient camp stove from these items.

Saturday, November 5, 2011

The tent, our home for twenty to thirty days.......


When Devon and I started planning this trip, we had very limited camping gear.  I had purchased a few small items when I was planning the solo run and we have some gear from camping trips our sons have been on with the Scouts.  Devon and I have never been camping together, so this ought to be interesting. 

There is a ton of camping equipment out there with a wide price and quality range.  Devon and I did a lot of research online prior to purchasing our tent, sleeping bags, and sleeping pads.  We did not purchase the most expensive equipment, nor did we purchase the cheapest.  We took a hard look at all of the reviews we read and our budget to determine which equipment would work best for our needs and within our means.  We purchased these items online, so we were not able to inspect them first.  This can be a little nerve racking, but so far we are happy with our purchases.

Last night, we put our new gear to the test and were quite pleased.  It got down to 45 F degrees last night with wind in the morning.  The forecast called for it to get down to 35 F degrees so we thought that would be a good test.  Since it did not get that cold, we have decided we will test it again before we go.  Since it can still get below freezing during June where we are going, we want to make sure the gear will work for us long before we leave.  We thought we would share a review of our thoughts about the equipment thus far.  Today we will focus on the tent, so if you will follow us to our back yard we will show you our tent.

All of this equipment is important for our journey; one thing we did not want to skimp on was the tent.  We wanted to make sure it would be rugged, easy to set up, and most importantly water proof since there is a high probability of rain for this journey.  After a few weeks, we had narrowed our tent choices to the Big Agnes Big House 4 and the Marmot Lime Light 3P.  Both are great tents with pros and cons to each.  The Big Agnes is very tall and is a four person tent while the Marmot is a three person standard height tent with two vestibules.  Keep in mind that a four person tent is really a three person tent and a three person tent is really a two person tent.  

We decided to go with the Marmot.  It is slightly smaller inside, but with two vestibules and two doors, it would be easier to get in and out of and would actually stow more gear.  The Marmot also packs smaller, weighs 6 pounds less, and was $100.00 cheaper.

The Marmot come in its own bag that measures approximately 22"X 8".  Packed, it weighs in at 6 pounds, 11 ounces.
The Marmot out of the packing bag
The poles and stakes are held in bags

The stakes are made of light weight aluminum and are very sturdy
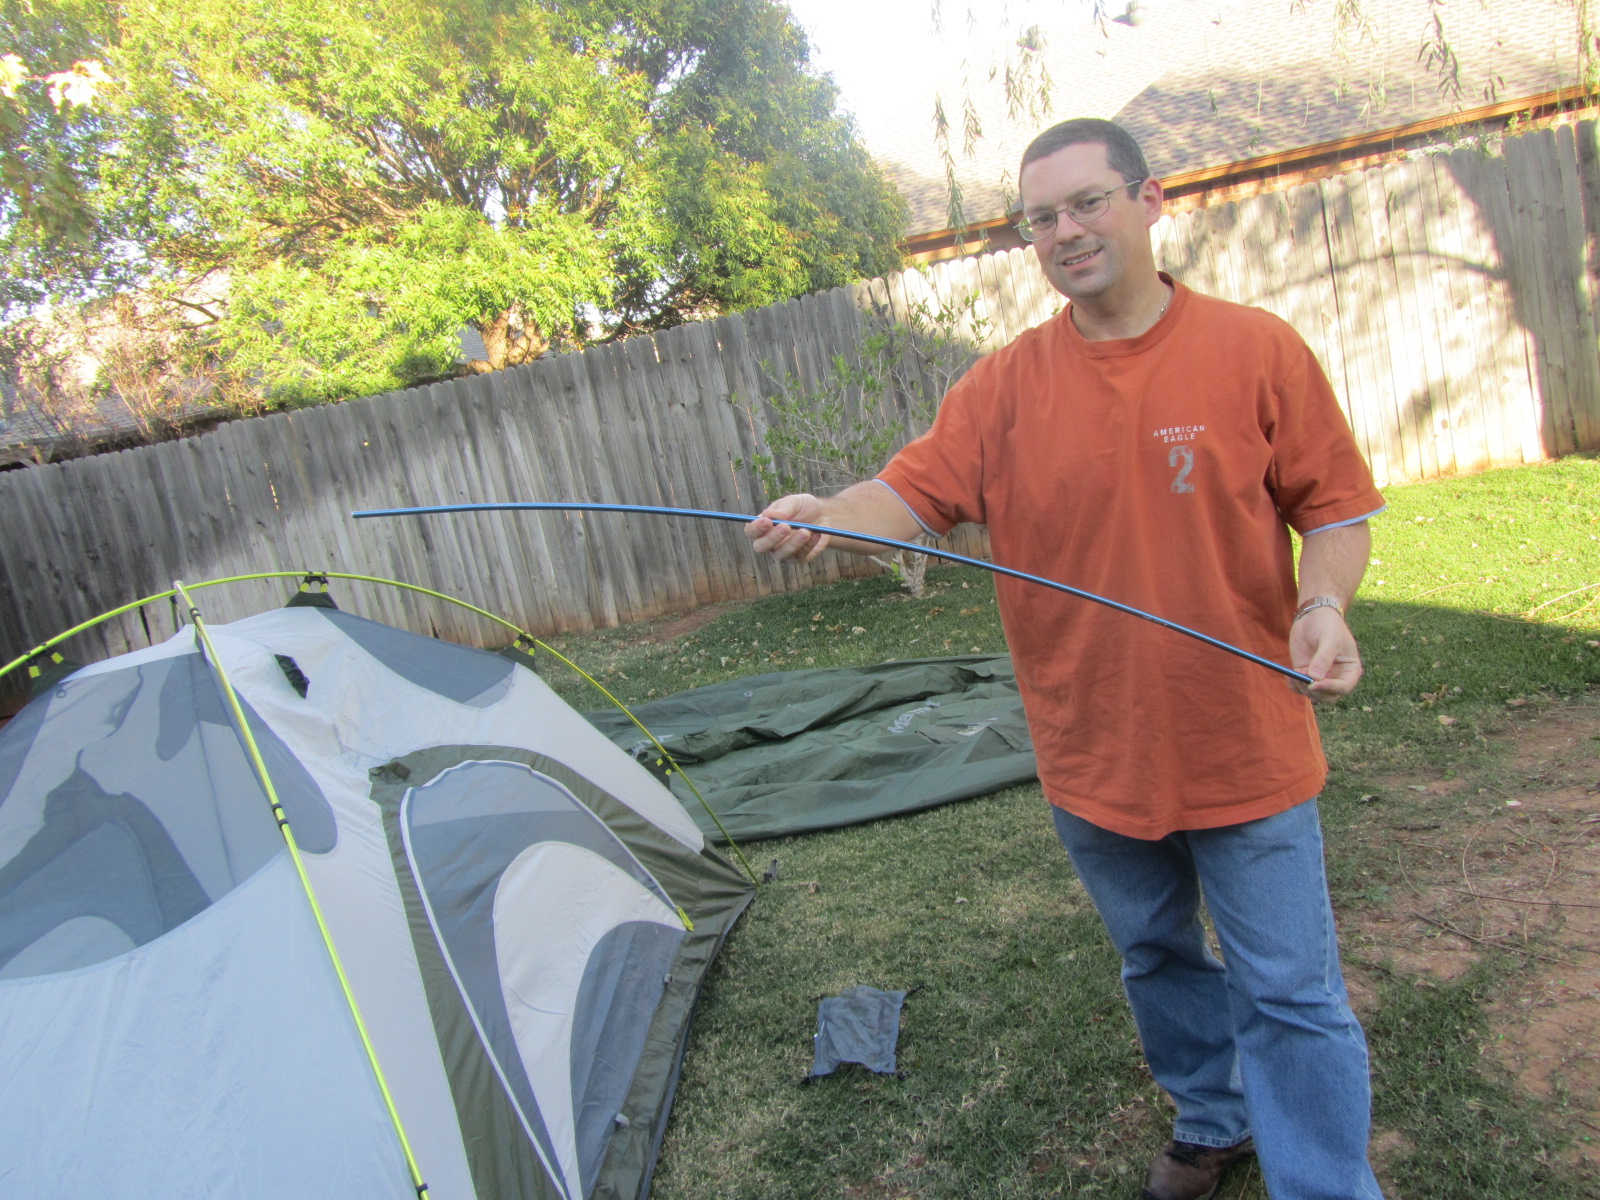
The poles are light weight aluminum.  Though this looks like a bunch of poles, there are really only three poles.  The yellow ones are hooked together in the middle with a piece of plastic, they form the frame of the tent while the blue pole is used to support the rain fly.
The tent comes with a very small gear loft.  It is only large enough to hold items like your glasses, an I pod, and a small book.
One other big selling point for the Marmot is that it comes with its own  footprint.  With most of the other tents we were looking at, the foot print had to be purchased separately.  If you are wondering what a foot print is, they are used as ground cloths under  tents to prevent the wear and tear of the tent against the ground.  A footprint also helps to keep water out of the tent in the event of rain.
The tent also comes with a large rain fly that goes all the way down to the ground.  All of the seams are sealed to make it water proof.
 Setting up our tent took us about six minutes total, this included taking the pictures.  I believe we could get this tent up within two to three minutes if we are not taking pictures.  Keep in mind that Devon and I are not avid campers and don't set up tents on a regular basis.  Part of the reason we picked this tent was that the reviews stated it was quick and easy to set up.  The set up was straight forward, easy, and very quick.  Let's look at the setup of what will be our home for twenty to thirty days next summer.

We unfolded the tent and placed it on the foot print.
The yellow poles snapped together easily and we placed them in an X pattern on top of the tent.  You will remember that the poles are held together in the middle with a small plastic piece.  This piece is placed at the center of the tent.
In each corner of the tent and foot print there are straps with bosses in them.  These straps secure the fly to the tent and are where the stakes attach to secure the tent to the ground.  The ends of the poles are placed in the bosses in these straps.
The tent with the poles set up.
The next step is to secure the tent to the poles.  Unlike other tents, the Marmot has plastic clips which secure the tent to the poles rather than sleeves for the poles to slide into. 
These clips make the tent a breeze to set up without the risk of tearing the tent or damaging the poles.

Next, it is time to add the blue pole.  This pole attaches to the top of the tent.  Hey, is that dirt on my upper lip?  No, don't be silly.  I'm growing a moustache for Movember.
Next, we staked the tent to the ground through the straps on the corners of the tent body and foot print so the tent is nice and secure to the ground.
This probably is the most challenging part of setting this tent up, centering the rain fly on top of the tent.
The rain fly is secured to the tent body with plastic buckles.  The straps can then be tightened to completely secure the fly to the tent.
The vestibules are also staked to the ground.  For high winds, there are tabs where you can secure the fly to the ground further with stakes and rope.  Here is what the tent looks like set up.
This photo shows one of the vestibules.  The vestibules will keep some of our gear and shoes dry and protected.
Though the Marmot is not as large as the Big Agnes, there is plenty of room for the both of us in it.
We would give this tent an all around high rating and are very pleased with our purchase.  This tent is so well built that we did not even feel the 4.7 magnitude earthquake that hit Oklahoma City last night.

Watch for information and reviews over the next few days about our sleeping bags, camping pillows, and sleeping pads.

Wednesday, November 2, 2011

Milepost-The Bible of North Country Travel

Can I just say how unbelievably happy I am that the Wing is back up and running?  Really Ed is a bear to live with when it’s down.  A complete and utter grump.  Not to mention my garage looked like a parts convention and me and the kids had to tip toe around it all, constantly in fear of accidentally moving something and watching the grizzly bear explode! 

Last week our Milepost arrived (thank you Amazon) and OMG we were sooooo excited.  Yes we were jumping up and down like a couple of teenage girls.  OK Ed wasn’t, but I was.
Our plan was to use our regular Saturday date night to sit and plan go eat at our favorite Greek place and spend lots of time reading.  But life has a funny way of biting you in the tucus and reminding you of your obligations.  The first problem that came up was our in house teens had a band competition in Broken Arrow.  This meant our two babysitters would be MIA.  So I put plan B into place…pack a book, the DS and iPod and bring him along.  He’s ten so I figured I could bribe him to be good with the promise of dessert, all the soda he could drink and tons the video games and all would be well.  Lucky for me he’s a good kid and easily bribable. 

After Ed spent ALL day with the wing I was anxious to get out and start planning and I think he was tired of hearing me squeal like a little girl.  So we loaded up our 10 year old and headed to Let’s Do Greek in Edmond, Oklahoma.  Part of the reason we love this place, aside from the really good food, is that it is run by a family that believes in family time.  What we failed to remember was that they close at 2 pm on Saturday’s because they spend time together as a family.  OOPS!  We had to go with plan B (again).  Off to Freddy’s Frozen Custard and Steakburgers, not Greek but we do love their frozen custard and my ten year old was over the moon excited about the promise of custard.  What can I say he’s cheep. 

The information in this book is truly amazing.  I was blown away by the amount of detail in this one book.  Not only were we able to map out our route, but we were also able to map out a few scenic detours.  I love that there were markers indicating where we could find camping,  amenities, wildlife viewing, medical aid, and gas stations.  No wonder it’s called The Bible of North Country Travel, it truly has everything.  Since I have not actually taken this trip I can only view it from the before part, but I can tell you it has answered just about every question I have.  I promise to blog after our trip and let everyone know if it lives up to its promise.  But I have a feeling it will give me all that I need and probably more.  Right now, and this could change, we plan to take the Cassiar and Yellowhead highways to Faribanks.  Three hours later, a steakburger, fries and a frozen custard we felt more informed.  We were ready to hop on the Wing and hit the road.  Too bad we had a 10 year old and Old Man Winter in our way. 

Although we seem to planning this trip we really aren’t planning.  We have a route; we have leave date and return date, but how many miles we cover each day will depend on how we feel.  Since we are camping, there will be no need to book any hotels not only will this keep our costs down but it will also give us more freedom to go as slow or fast as we like.  I may not be a big fan of camping but I want my freedom to roam as I please more than a comfy bed.  And believe it or not I'm actually looking forward to it. 

So now we have one more thing to cross off our list, one step closer to our dream.  Our tent and sleeping bags arrived and were planning on testing them out in the backyard.  Keep your eyes peeled for a review.  
Planning the trip with The Milepost.

Sunday, October 30, 2011

Throttle Cable Done

Yesterday was a great day, not only was I able to get the Wing back up and running but I was able to spend an evening with Devon talking about and planning our route.  We purchased a copy of The Milepost based upon the recommendations of other riders.  Wow, what a book.  It details all the major routes in the northern region mile by mile.  It is extremely detailed, and I would highly recommend purchasing a copy if you are planning a road trip to that area.  Devon and I spent three hours sitting in a restaurant picking through the book.  We have been rethinking our route based upon feedback provided by our two wheeled friends.  We are still considering routes, so look for future posts about our route.

We have been receiving a bunch of feedback about our trip as well as links to other blogs and ride reports.  I have created a links section to our blog page to the pages of others.  Devon and I created this blog not only to share our experience, but to be a resource for others wishing to do a similar trip.  We have enjoyed reading about the experiences of other riders and will update the links section as more rides are shared with us.  There is a wealth of information out there and it is all great reading.

Anyway, onto the reason for this post.  I feel like my motorcycle is an extension of myself, it provides me with a silent place to go where there are no cell phone, no email, and no real worries.  It is a true escape.  When I am on my motorcycle, I can fully understand why a dog likes to stick its head out the car window.  If you ride, you know what I am talking about.  I ride all year round and have not had a car now for 7 years.  I ride in the heat, cold, and rain.  The only time I do not ride is when it is icy out.

It has been an extremely difficult week for me.  I worked a ton of hours and would come home each night to see the Wing torn apart in the garage.  I missed riding it all week, so on Friday evening I turned on the tunes in the garage and started where I left off from the previous Saturday.  I was not able to complete the bike on Friday evening and would finish it on Saturday morning.  This job was not a real difficult job, it was just very time consuming.  All in all, it took me about eleven hours to complete the job.  I am fairly mechanically inclined and am familiar with the Wing, but for some reason I get slightly intimidated working on it.  With cars, I have done everything from replacing motors to changing oil so I am not sure why working on the Wing intimidates me.  I guess it is because it is such a well built machine that I hardly ever have to work on it so my exposure is not as great as some of the junker cars I have had in my lifetime.

I took a bunch of photos, but inevitably I missed a few.  The cable replacement itself was very simple.  I did not have to remove or loosen the carburetors.  My procedure is outlined below, so turn your tunes on and follow me to the garage.

When we last left the Wing, it looked like this:


It was completely ready for the cable swap.  The first thing I did was to replace the push cable.  I figured it would be the easier of the two to replace, but I was wrong.  Though not difficult, there were a few extra steps.  I followed the cable from the throttle down and across the handlebars to the left side of the bike.  It leads to a sort of junction box mounted to the frame under the left fairing by the left air duct.  Here is a photo of the junction box, you can see it to the right of the air duct.  Yep, that's it the piece with the cable bolted into it. 


The cable bolted into it (marked with a pink dot above), is a short relay cable that goes from the box to the carburetor.  I did not remove this cable.  It looked to be in good shape and I did not order it with the other cables.  In the front of this box, the cable to the throttle.  This is the cable we need to remove.  But first, we need to remove the air duct.  The air duct is held in place with two screws and nuts.  One is right there on the fairing, the other is deeper in the fairing, you can see it toward the front of the bike near the handlebars.  Unfortunately, I was so focused on getting the vent out that I forgot to take a photo but this part is fairly straight forward.

Our next step is to take the cover off the push cable relay box.  Hey, can you hand me that screwdriver?


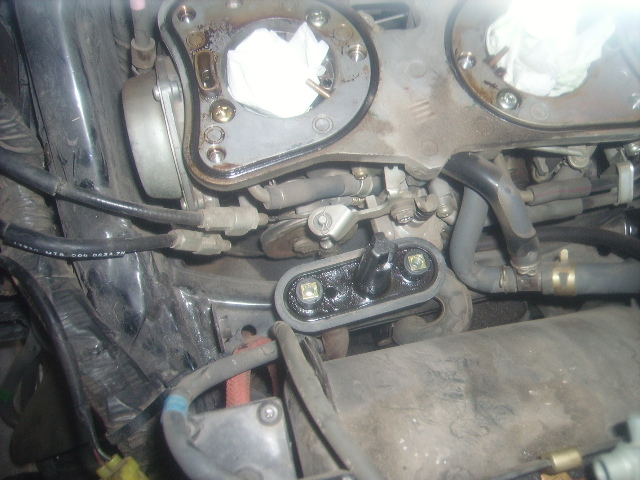
I accessed the cover screw through the side marker hole in the fairing.  When you take the cap off, you can clearly see the relay.  We can also see the cable we are after in this photo.  It is in the front of the box, if you look closely, you can see it has a blue dot on it.  There is a little rubber grommet on the inside of the relay box around the cable from the throttle.  This grommet has to be removed, but has to be done when the cable is disconnected.  To disconnect the cable, I unbolted it from the front of the relay box.  I then rotated the plastic piece where the cables attach to give some slack, then used a small dental pick to unhook the cable.  Here is a photo I took of the relay straight on, this is a view through the side marker lamp hole in the fairing, it shows the cable unbolted but still hooked to the plastic relay.


Here is the cable disconnected from the relay, sorry for the blurry picture I'm not very coordinated, so it's hard to do this one handed:


I then unhooked the push cable from the throttle and pulled the cable out, threw it on the ground and did a victory dance.  Installation was the exact opposite including another victory dance.  Unfortunately, I did not get any photos of the installation, but here is a tip, don't forget the little rubber grommet inside the relay box otherwise you will have the opportunity to perfect this procedure by doing it a second time when you look down and see the piece sitting on the garage floor (I lost about 15 minutes there).  Yee Ha, one cable down, one to go!

Our next focus will be on the pull cable removal.  I had a few folks recommend the following tools for this project; an 11 inch set of straight needle nose pliers, an 11 inch set of 45 degree needle nose pliers, an 11 in set of 90 degree needle nose pliers, and a 10 mm crowfoot wrench head that could go on a socket wrench.  I did not use any of the needle nose pliers, but new tools are always welcome in my tool box.  That is part of the reason I like doing my own repairs, it gives me an excuse to buy more tools!  Anyway, without the 10mm crowfoot wrench I suspect I would have had to loosen and tilt the carburetors to be able to gain access to the nut at the end of the cable near the carburetor.


This picture shows the crow foot wrench on the nut at the base of the carburetor.  Once it is loose, you can pop it out of the mount.  Here is another tip, when removing your crow foot don't pull strait back, it will fall off the end of your socket extension and you will wind up fishing for it with a magnet for about 30 minutes.  You will eventually find it, but will need a short 15 minute break afterwards.  Here is the cable unbolted and detached from the mount:


The next step is a little tricky.  You have to rotate where the cables connect to create slack so you can disconnect the cable.  The reason why this is tricky is because there is very little room.  Here is how I did it.


I used a flat-head screw driver to rotate the cam all the way over.  This created enough slack for me to remove the cable from the cam with a needle nose pliers (a regular set, the 11 inch ones were too long).  I would have loved to get a photo of this for you, but I was not able to.  Be very careful not to hit the vacuum line next to the cam with the screw driver.  I don't know what that line does, but I'm sure you would not be happy if you ruptured it.

 
Here is the cable removed.  From here, I pulled it out through the fairing, unscrewed it from from the throttle on the handlebar, threw it on the ground, and did yet another victory dance.  Phew, I'm out of breath, time for a Coke.

Installation was the exact opposite of removal.  The only difference was that I did not use the needle nose pliers to reinstall the cable on the cam as I did not want to risk damaging it.  I used my fingers.  This took some patience and a little time, but it was not hard at all.  Here is what the new cable looked like installed:


Here is how the cables routed under the handlebar:


I hooked the cable ends up to the throttle tube at the handle bar and screwed the cable end retaining nuts back into place.  Here is what it looked like once I bolted the throttle back together.


The next step was to adjust the throttle.


On the pull cable, there is a rubber boot.  When the boot is pulled back, there is a jamb nut and an adjusting nut.  To adjust the cable, release the jamb nut and adjust the adjusting nut.  I set my throttle to about 1/8 inch of play.  We will see how that goes and re-adjust if necessary.

Next, I attempted to fire the beast up but she would not fire.  I spent about another 30 minutes trying to figure out why.  I focused on the reverse lever because the reverse light was on on the dash.  Silly me, it turned out I bumped the kill switch on the top of the throttle to the off position.  I switched it back to on and she fired right up.  I checked the operation of the cables, and they were working perfectly.  This time I did a happy dance!

At this point, I look around the garage.  There were tools laying everywhere and it looked like a Goldwing parts explosion happened in there.  I thought to myself, "sure hope I don't have any left over parts when I am done".  Well time for reassembly, if you need to take a short break I understand.  I'll be here when you get back.

The first step was to put the cap back on the push cable relay box, I need that screw driver again please.  After getting the cap back on, I placed the vent tube back into the fairing and bolted it back in place.


Now was the time for the step I was dreading the most.  Surprisingly it was not that difficult.


I ratcheted the small plastic piece that screws to the bottom of the air filter box back to its hoses.


I then set the air box back in place and re-attached the green stripped and pink stripped vacuum lines to the left side of the air box.  Now was the hose I was dreading the most, the large one on the bottom of the air box.  This is extremely difficult to get to.  I read on line to use the 11 inch pliers to reach the clip and mount the hose to the bottom of the air box by approaching it from where the front of the seat would normally be.  This did not work for me.  After about 45 minutes of messing around, I decided to pull the right fan. To see if I could access the hose from the underside.


Well hot diggity dog, there is the hose.  It is the hose with the dark green stripe on it.  I was able to move the clamp on the top side of this hose to its normal position, then push the hose on to the nipple on the air box from underneath through the fan opening.  I double checked that the retainer clip did not slip down as I pushed the hose onto the nipple.  Everything was secure and in place.  I reinstalled the fan, sorry I forgot to take photos of the fan removal and installation as I was very focused on getting the hose hooked back up.


I screwed the six screws in the air box to the top of the carburetor and the two screws that secure the plastic piece noted earlier that screws to the bottom of the air box.

 
I then bolted the air box back to the frame on the right and left sides.  There is a green plug with wires on it that plugs into the front right of the air box, plug it back in.  It now was time to put the air filter back, so I placed it in the box and screwed the box shut with the necessary screws.  I also put the cold air intake back on the front of the air box.   

Now, let's put the body work back on.


Up first is the right side shelter.  This piece is held in place with two screws and a nut.


I placed this piece on the bike, there is a tab that goes on a stud near where the front of the seat is.  When placing this piece back on the bike, do not forget to plug the wires for the air pump back in place.  I placed the nut back on.  It is not necessary to put the nut back on at this point because you will only have to take it off again to install the top shelter.  I put it on so I would not loose it.


I secured the screw which attaches the panel to the fairing.

Next, I installed the screw at the back of the panel.  This screw has a stud on it which holds the grommet for the side cover when the side cover is installed.


The next piece to go on is the front right lower cover.  When installing this piece, make sure to plug the lights back in.  The very first time I removed this piece, I forgot to do this and had to take it apart again to plug the lights back in.


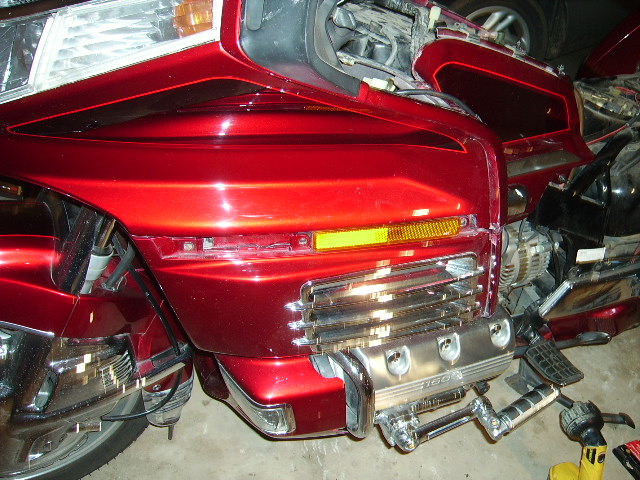
This piece has a little nub and two small extensions at the bottom that snap into the lower cowl.  There are three screws that fasten the panel to the fairing near the side marker light.

 
Here are the screws and the chrome piece that covers the side marker lamp.  Just line up the screws and tighten them down.


Next is this trim piece, it simply snaps in place and covers the upper seam of the fairing.  Here is what it looks like installed:


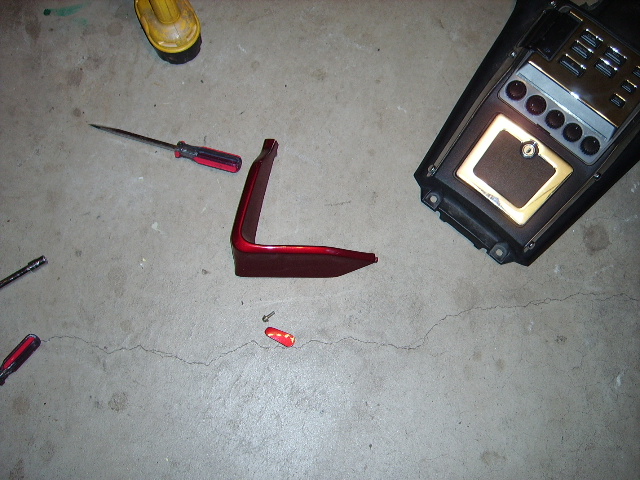
Next is this little L shaped piece and screw cover.  It fits below the fan.
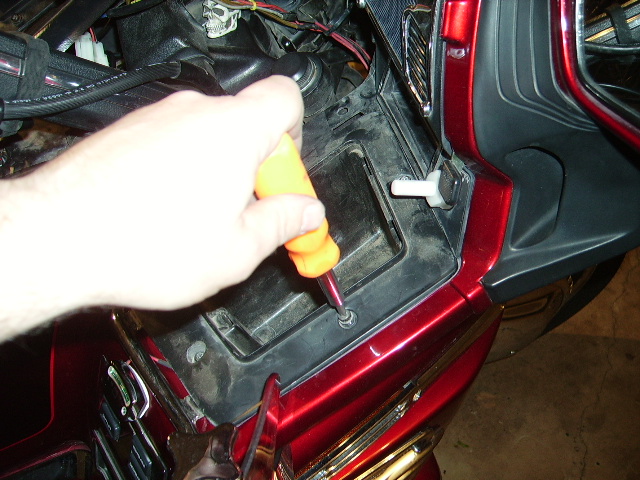


Simply slide the tabs into the holes on the lower fairing cover and side shelter cover and screw it in place.


Then put the screw cover back in place.

Cool, the right front side of the bike is done.  Let's move to the left side.


Time for the left side shelter to be installed.  It goes on the same as the right side with the exception of the reverse lever.


Make sure to plug the CB in when installing the shelter cover.  The next few photos show the installation of the shelter.


Next is the installation of the reverse lever.  It screws back in place, you then need to slip the rubber cover back onto it.


The lower fairing cover, seam piece, and L shaped piece go on the exact same as they did on the right side.


The next piece to go back on is the plastic piece that goes above the cowl.  It looks like this:


The three tabs at the bottom fit into the cowl and there are two grommets on the inside of this piece that fit over studs under the radiators.


It pops in nice and easy.  Now the front and front left side are done.  Time to focus on the top.

The next series of photos show the installation of the wind wings, fairing pockets, and foot vent control knob.  Do not make the same mistake I did and install the fairing pockets at this point, they should be installed after the top shelter and radio are installed.  I had to take them back out before putting the top shelter back on loosing another 15 minutes.


Time for the installation of the top cover and stereo.  Below are photos of the shelter and stereo, note where the connections for the stereo are:


Here are the wire connections for the stereo on the bike and what it looks like when installed.


Next, there are two white plastic clamps that you push on to lock down the top cover.  Also, those nuts that we put on so they would not get lost earlier screw down at the back of the top shelter.


The key surround, plastic fillers, and pocket covers are put back on.


Next are the seat, side covers, and carburetor covers.


One last look around the garage, no extra parts laying around.  Awesome!!

The final step is to get a nice kiss from my wonderful wife.


I also installed a head light guard to protect the headlight from rocks.


The Wing is back on the road, and all is good in my world again.  Though this job took a long time to complete, I want to emphasize that it is not a hard job.  Thank you for taking the time to read my posting.