Sunday, November 27, 2011

Prep Phase

Hello again, Ed here.

We sure hope you had a wonderful Thanksgiving.  Thanksgiving is one of my favorite holidays and we were fortunate enough to have it twice this year.  We had one dinner last weekend with Devon's father who drove down from Kansas and another one a few days later with Devon's little sister who drove down with her husband from Missouri.  Devon is an excellent cook and knocked it out of the park both times.  It was really great to visit with all of them as we don't get to see them often enough.

Even with the distraction of the holiday, our preparation for the Alaska trip is ongoing.  Before I tell you about what we have done this week, I need to correct an error from the heated gear post.  After some research, I discovered that te accessory electric hook up at the top of the fuse block on the Goldwing is rated for only 5 amps.  Each liner draws approximately 5.7 amps, so the hook up at the top of the fuse block is not the best choice for a hook up.  I re-routed the cable and hooked it up directly to the battery.  This will work out much better.  Devon and I have turned the liners on and confirmed they worked, but it has not quite been cold enough here yet for us to test them on a ride.  It is supposed to be colder her this week, so perhaps this week.

We ordered some pants that convert to shorts this week.  These were a great buy.  The material is a little thin as they are designed more for UV protection and quick drying.  They still will work great for our trip because they are light, fold up small, and save us from having to pack an additional pair of shorts.  They are very comfortable.  The men's pair is true to size for the waist, but appears to run long.  The 30 inch inseam I purchased is more like a 31 inch (just enough that I will have to hem them).  The women's length is correct, but tends to run on the lower end of the size range given on the sizing chart.

Last night, we went to Academy Sports and purchased Rio Adventure Roll-Top 18 table.  This small table will be perfect to use while cooking.  It packs down to 18X7X3 and weighs less than 5 pounds.  It is made of aluminum and is extremely sturdy.  Here are some photos:
The table comes in a compact bag for easy packing
The table comes in 4 easy to assemble pieces.
Here is the base of the table.
The support bars snap into place.
Here is what it looks like with the support bars in place.
The table top snaps into the pins on the support bars.
Here is the table completely assembled.  It should be perfect for cooking.
Also, over the weekend, we we ordered a Garmin Zumo 550 GPS and a Kennedy CellSet.  The Zumo was an excellent buy due to a Black Friday deal and Kennedy is selling off their entire stock of CellSets as they are no longer going to produce them (their pricing is currently based off best offer) so we scored an excellent deal there.  I had a Kennedy CellSet on my Goldwing 1800 when I had it and it was awesome.  This set up will allow us to listen to our music, talk with each other through our headsets, use the CB, hear turn by turn directions from the GPS, and receive/make cell phone calls while on the bike.  Though the set up is a bit pricey, it should be well worth it.  I have removed my old GPS from the bike, so there is now an empty space anxiously waiting for the Zumo.  We of course will be taking along some paper maps and a compass in case of GPS failure.

We really are basically set for this trip as far as gear goes.  We still need to pick up a few odds and ends, riding lined pants, and a tarp with poles.  We will pick these items up over the next few weeks.

Tuesday, November 22, 2011

Are You Crazy Or Something?

I’ve been getting this a lot lately.  Seems everyone wants to know why I would want to hop on the back of a motorcycle and go to Alaska.  Planes can get you there a lot faster and if Alaska is the goal then why don’t we get there so we can spend more time seeing all the sights.  Why go through the trouble of driving there?  Why camp along the way?  Why suffer the cold?  Why?  Are you crazy or something? 

Simply put, yes.  Yes I am. 

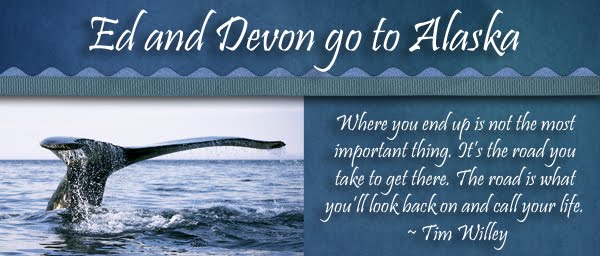
These are just a few of the comments I’ve been getting since I announced that I would be going with Ed to Alaska.  At first I would laugh along with them and say ‘yeah I guess I am a bit nuts.’  But the more I thought about this the more it occurred to me that I’m really not.  This is a perfectly sane thing to do.  Getting to Alaska and the Arctic Circle is a goal of ours.  But it is not THE goal.  THE goal is the ride.  It is the journey.  It is about enjoying the slow way to Alaska, the sights, sounds, tastes, meeting interesting people and experiences along the way.  This is a journey not a destination.

In other words I changed my mind.  What can I say I’m a woman and we tend to do that.  It’s all part of the big plan guys.  We do it on purpose.  It keeps you on your toes. 

A few years ago Ed and I made some changes in our life.  We found that we want to travel more, see the world and experience it and we want to do it together.  We also found that there is nothing, and I mean NOTHING like being on a bike.  It’s just a better, more amazing, and more awesome way to travel.  You see more.  You smell more, and you feel more alive.  Personally I feel more connected with nature and I feel this connection with the road.  How do you explain that to a non rider?  I guess its like trying to describe the color red to someone who has never seen it and never will.  For those who don't ride they just don't get it. 

My few regrets about this trip are that we can’t take more time to explore.  But we are young(ish) and still have our three wonderful kids at home.  Finding someone willing to take them on is challenging especially for three weeks!  Also, Ed and I do have to work.  It would be nice if we could just pick up and leave for five or six weeks but we do have to pay the bills and we do enjoy eating.  So we will be grateful for the three weeks we are getting and enjoy what we can.

Ed has also told me that many guys have told him that their wives would never, ever take a trip like this with them.  I find that to be so sad.  What a loss for those ladies.  Three weeks with my wonderful, super, great husband.  It will be three weeks of just us, no distractions, no one to bother us.                              Ummmm….wait what the HECK WAS I THINKING!!!   

Seriously I am beyond thrilled to spend it with Ed.  I can hardly wait to try this adventure with him and I would tell all wives to go out and do it.  Be adventurous, be courageous, try something different.  After all you might find that you love it.  I swore I would never, ever get on the back of a bike, I used to be someone who didn't get it. 

To have missed out on this would have been my loss.  How happy I am that Ed showed me these colors that I had been blind to.  How lucky I am to have such a great guy in my life. 

Sunday, November 20, 2011

Heated gear

Hello again, Ed here.

One thing that is important to me for this trip is Devon's comfort.  This will be our longest and most challenging trip yet, so we are purchasing some additional gear that we have not needed up to this point.  Devon tends to get colder than I, so I wanted to be able to figure a way out to keep her warm while we are cruising down the road.  I also started thinking that I too would like to be warm as there is a possibility that we will be riding in cold weather day after day for several days.  I was listening to a motorcycle radio show called Side Stand Up and they were talking about riding gear and a few words kept resonating in my mind, "a cold rider is a distracted rider".  So with a very short discussion and an easy sell, I convinced Devon that heated jacket liner would be a good idea for this trip.

We wound up going with Firstgear Heated liners with the Warm and Safe dual heat troller.  We will be using the dual heat troller to control both liners.  Hooking the troller up to the bike was easier than anticipated (instructions for the hook up are below).  These liners are nice and warm, I especially like that the collar is heated.  Usually, if I get cold it is the front of my neck, with the collar zipped up my neck should be nice and warm.  Though this was a fairly hefty investment, we are happy with it and feel it is definitely the way to go.

Yesterday, in addition to installing the heated gear on the bike, I was able to install a second 12volt plug in the right saddlebag.  Now we will have two places on the bike to charge cell phones, Ipods, and the yet to be purchased Acer Netbook.  I was also able to install one of the most important accessories on the bike:

ADV Stickers!

The ADV Sticker on the back of the trailer

Let's look at the easy installation of the heat troller.

Remove the right and left side covers
Remove the seat
Disconnect the battery cables. 
Here is the part of the heat troller that stays on the bike.  It has a 15 amp fuse in it.  The troller plugs into this piece.
Under the left side cover, the fuse block can be found.  I removed the fuse block cover to expose the accessory hook ups at the top of the fuse block.  I hooked up the heated gear here rather than directly to the battery, this way the heated gear will always be off when the key to the bike is not on.
Hook the positive to the positive side. 
Hook up the negative side
It really is just that easy!  The fuse cover can now be put back on.
I used a couple of zip ties to secure the cable to the frame.  I mounted the cable here so that when it is not in use, it can be hidden under the side panel.  When it is in use, it can be pulled out of the side panel.  I have seen other folks who had the plug sicking out from under their seat near the gas tank.  I did not like the way that looked because the plug is always visible.
When ours is not in use, it will be hidden under the side cover.
When in use, we can pull the cable out from under the cover.
Here is the Heat Troller
The troller has two knobs on top, one for each garment.  The LED lights light up when the knobs are in the on position.  The troller allows the rider to adjust the amount of heat the liner will put out.  There is not a low, medium, or high setting, it is like setting a thermostat so it is off, high, or anything you desire in between.  The knobs color code to the hook up cables for the liners.
The red male plug is the power source which plugs into the lead on the bike.  The yellow female plug corresponds to the yellow knob on the troller and the red plug corresponds to the red knob.  The operation is plug and play.
Devon lookin' hot and happy!  ;-)
I also wired a 12 volt power outlet on a long wire  in the right saddlebag.  This will give us another plug in to charge our rechargeable gear.  I put it on a long wire so we can hook our air pump up with a long lead in case we need to help another  rider out.
The research for and dreaming of this trip continues.  Devon and I are so synchronized about this trip that it is almost scary.  June cannot come soon enough, we simply cannot wait to twist the throttle and have our rubber roll over the rock until we hit Alaska.

I have heard of other riders talking about experiencing a great awakening when taking a very long extended trip like this.  I suppose that is because you can unplug from the rat race, live simple with few obligations, and find someplace silent.  I often dream about this and wonder what it will be like.  I'm looking forward to the sights and the people  we will meet.  I am sure this will be a life changing trip, and I simply wish June would hurry up and get here. 

Thank you to everyone who has provided us with suggestions and support for this trip, and thank you for looking at our blog.

Until next time,
Ed

Sunday, November 13, 2011

Building a pop can stove

Hello everyone, this is Ed.  Just like every other morning for the past few years, I have woke up thinking about the ride to Alaska.  With the ride being only a few months away, there is still a lot to be done.

This week, I am going to focus camp stoves.  I did a ton of research on the internet about stoves when I was planning this as a solo ride.  I needed a small, lightweight stove with readily available fuel that was reasonably priced.  This is when I learned about a home made stove that is used by many motorcycle adventurers.  A pop can stove is easy to build, burns HEET which can be found at any gas station, cooks well, compact,  light, and is extremely cheap. So pull up a chair at our kitchen table and let's look at how to build one of these things.

Here are our supplies; two full pop cans, a bottle of HEET, and a penny.  As for tools, can you hand me the scissors, those books, that knife, my Leatherman, the drill, and the smallest drill bit that will fit in the drill?  Cool, thanks let's get started.
The first step is to drain the cans.  Thanks for helping me with that.
We are going to have to cut both cans at different heights.  With the first stove I built, I free formed my cuts.  This turned out good, but I went through four pop cans before I got it right.  I have found that using two books as a guide helps to keep your cuts straight.  I suggest using some of those books about Alaska that you have laying around your house.
For the first can, stack the books so the height is about 1 1/8 inch tall.  We'll place the knife on top of the books and score a line by rotating the can along the knife blade.  This will give us a scribe line for our cut to this can. 
Here is what the scribe line looks like on this can. 
We will remove the thinner book and scribe a line on the other can.  This line should be about 1 inch in height.
The scribe line on the second can.
Time to cut the first can.
This piece will be our burner when the stove is done.
Time to cut the other can.  I found that it is easier to cut the can in small strips until you reach the scribe line.
Can two will become the fuel chamber of the stove.
Let's look at the can piece that is 1 inch high which will become the burner of the stove.  On the bottom of this can, there is a raised number.  Not all pop cans have numbers stamped into the bottom.  If there are raised numbers on your can, you will need to remove them so your penny will seat correctly (we will go over this a little later in the post).  So, if you will follow me out into the garage, we will do a little metal work with precision tools.
We'll take the largest screwdriver in my tool box and place it in the vice.
We'll place the pop can on the screw driver.
Gently tap the can until the stamped numbers are no longer there.  It is important not to flatten this area of the can, you want to keep the curvature of the can so the aim is simply to remove the stamped number.
Here is what it will look like with the stamped number removed.
We will now take the smallest brill bit that will fit in the drill and drill three small holes in the shape of a triangle in the center of the can.  I held the can in my hand while drilling the holes so the edges would not bend.
Here is what the holes should look like.
Now, we are going to drill 12 holes around the edge of the base of the can. 
This will become the burner of the stove.  Doesn't the Wing make a great backdrop for this photo?  Let's head back inside to finish the stove.
OK, now that we are back at the dinner table, we'll take the Leatherman and make a series of crinkles along the side of the burner.  This will allow us to slip in into the other can half.
Very nice, well done!
Next, we'll slide the burner into the other can section and push it all the way down.
This is a side view of what the stove should look like.  At this point, the stove is basically complete.  Let's go outside and test it.
Pour the HEET into the center of the burner and fill the lower chamber.  You will need to experiment with how much fuel you are adding so your stove will stay burning for the desired amount of time.  I like to fill mine to burn for 8 to 10 minutes.  This generally allows me plenty of cook time.  You will be surprised at how quickly water will boil on with this stove.
Place the penny over the holes in the center.  The penny is used as a pressure valve to increase or decrease the size of your flames.  You can move it around once the stove is burning to determine the best position for you.
Pour a little HEET on the penny and go ahead and light it, then let it burn for a bit.  What will happen is the HEET in the fuel chamber will start to boil, the fumes will come out of the holes with an even burn pattern.  You will be able to hear this happening.
Isn't that cool!
Here's a picture in the dark that shows the burn pattern a little better.
Here is the final product.  To build a stand for the pot, I took a canned chicken can and drilled holes in it.  The pop can stove was placed in the chicken can.  The chicken can not only acts as a stand for the pot, but also as a wind screen.  Since I was cooking in a dry field, I put the top of my mess kit on the ground for the stand and burner to sit on.
On our trip, we are planning to bring two of these stoves to use for boiling water and cooking smaller meals.  We are also bringing an old dual fuel Coleman two burner stove that we have had laying around for about 15 years.  It looks like this, only not as new and clean:
As with any home made piece of equipment, especially one that uses fire and fuel, be careful and use it at your own risk.  I hope you enjoyed building this stove and hope you get some use and enjoyment out of it. 

Next week, we are going to try to install the components for our heated gear on the bike.

Thanks for looking at our blog, I look forward to talking with you again soon.