Sunday, April 1, 2012

Preparatory Maintenance Fork Oil Change and Speedometer Cable Lubrication

Well hello, Ed here.

It's been quite a while.  Devon and I have been quite busy over the past several weeks with family.  We had multiple visits from family and I had to complete some time consuming auto repairs which ate up a few Saturdays.  I was also able to ride back to Colorado for my uncle's birthday party.  It was a very quick trip.  While in Colorado, I was able to visit with family that I do not get to see very often.  It was quite an enjoyable time and it was really nice to reconnect with them. 

We are almost 60 days out from our departure date, so it's time to start going through the Wing.  I want it to be in tip top shape when we leave, so I am going to do a bunch of maintenance to it.  I also have an appointment scheduled to have the tires changed out in the middle of April (this will give me some time to scrub them in before we leave).  This weekend starts my maintenance run on the bike, so check back often to see what is going on with the bike.

This week, I completed a fork oil change.  This is the first time I have attempted this service on a Goldwing, so a few rookie mistakes were made and there were definitely a few lessons learned.  Hopefully, you will learn from my mistakes and your fork oil change will go quick and smooth.  Let's go out to the garage and get this done.

Welcome to the garage.  There she sits ready to be worked on.  I already put it on the center stand.

The rotor covers need to come off.  Let's start with the left one.
At the top rear of the front fender just behind the fork is a plastic cover that needs to be removed.  This cover pulls off a grommet at the rear.  There are two tabs which fit under the front half of the front fender.  Be careful not to damage these tabs when removing this piece.  I usually pull out on the front half of the front fender a little, then slide the piece out.
Next it's time to remove the caps on the rotor cover which cover the screws that hold it on.  Here is the removal of the front one.
And the removal of the rear one.
Under the upper cover, there is a bolt that needs to be removed. 
Take the bolt out, but be ready, there is a small bracket behind it which may fall.
Here is the bracket I was talking about.
Next, remove the two lower bolts that hold the rotor cover on.  On my bike, these are hex head bolts.
I have lights in my rotor covers, so I disconnected the wires.  The cover then pulls right off.
Here is what the left side looks like with the rotor cover off.
Whenever I have the rotor covers off, I always like to check the brake pads.  As you can see, my pads on the left side look good.  I am going to take an extra set of pads with us to Alaska.  I know that is probably overkill and we probably won't use them, but I figure better safe than sorry.  Besides they won't take much space.
Time for the removal of the right side rotor cover.  The removal procedure is exactly the same as the left side, so I won't bore you with the details.
Here is what it looks like with the right rotor cover removed.
The right brake pads look OK also.  It was more difficult to get a good angle for this shot, so it looks more worn than it actually is.  This photo reminds me of abstract art, I like it!
Both right and left fork caps have to come off.
They simply screw on over the schrader valves.
Time to lift the front wheel off the ground a little.  I used a scissor jack and a short 2X4 to lift the bike.

The object is to get the front wheel just slightly off the ground allowing the forks to fully extend.
Time to remove the Schrader valves (both sides).
Here is the right Schrader valve removed. 
And here is what it looks like with the left valve removed.  So here is where I made my first rookie mistake.  My original plan was to take a small wooden dowel and stick it in the valve holes to determine how much fork oil I would need to put back into the forks after I drained them, sort of a dipstick method.  When I stuck the dowel in, it went in about three inches, then stopped.  I thought, ah crud, there is a solid spacer or something in there stopping the dowel from going all the way down.  My revised plan was to measure the volume of fluid that came out of each fork so I could replace the exact amount of fluid.  In retrospect, I wish I would have been more patient with the dowel dip stick measurement method.  I later found out that if you wiggled the down around slightly, it would go down all the way in the tube. 
It's time to drain the old oil.  There is a small bolt towards the bottom of the fork that needs to be removed to drain the oil.
The bolt is a 10mm bolt.  Be ready to catch the oil when it comes out.  I was using a mason jar to do this.  I placed it directly under the bolt ready to go.  So right now, about a third of you are laughing, another third are gasping, and the other third are wondering what is going to happen.  Please keep in mind as you read on that this is the first time I have done this procedure on a Goldwing.
Ahh crud, oil everywhere except in the mason jar.  The oil came out with more force than I expected. Either be prepared for it, or have a catch tray larger than a mason jar.  After cleaning up my mess, I realized my plan to measure what I took out so I could put the exact amount back in was no longer going to work.  When researching how to do the fork oil change, I remembered this thread on a forum I frequent.  Based on this thread, The measurements are as follows:  "measuring from the TOP OF THE FORK NUT (schrader valve removed) looks more like this --

Oil fill with forks fully extended and springs installed (measured from the top-plane of the fork nut with the air valve removed):
400mm / 15.75" for 88-94 (Progressive springs installed tight end down)
406mm / ~16" for 88-94 (Progressive springs installed loose end down)
408mm / ~16.1" for 88-94 (OEM springs installed)


  355mm / ~14" for '95+ (Progressive springs installed tight end down)
  361mm / ~14.2" for  '95+ (Progressive springs installed loose end down)
408mm / ~14.3" for  '95+ (OEM springs installed
)"

I did the same thing on the right side, this time without the mess.  I have Progressive springs in my Wing, so I am going to set the fluid level to 14 inches. 
While I let the forks drain, I serviced our lawn equipment.  I really cannot sit still when I am in the garage.  I like wrenching on things.  Servicing the lawn equipment took about an hour which was just about the right amount of time to let the forks drain.
It is amazing how dark the old fluid is.   
In contrast, here is the new oil.  I purchased Maxima 10 weight fork oil.  This oil is clear, but most fork oil is red in color.
I put the drain bolts back in.
OK, so what is important with fork oil is that you get the level the same in both tubes.  So to accomplish this, I took an old spray head and attached a tube to the bottom.  I marked a spot on the stem of the spray head and measured down from it 14 inches. 
I then stuck a syringe in the schrader opening to act as a funnel and poured the new fork oil into the forks.  I put 380 ml in each fork.  Remember that the volume is not as important as the distance from the top of the cap, we are looking to get the level to 14 inches from the cap to the top of the fluid, so we are going to drain some off.
Next put the schrader valves back in and take the bike off the jack.  Then get on the bike and take it off the center stand.  Grab the front brake and start rocking back and forth vigorously.  The object is to cycle the forks about 15 times to move the fluid through all the valves in the forks.  Once you have completed this, put it back on the center stand and remove the schrader valves again.
Stick the tubing into the hole where the schrader valve goes.
Stick it all the way down to the mark where you measured down and cut the tubing.  In my case, I measured from the white label, so there is 14 inches of tubing in my fork.  Now I squeeze the trigger to pump out the excess fluid in both forks.  After completing this on both forks, I realized my second rookie mistake.  I forgot to jack the front of the bike back up again.  Crud, I jacked the front back up and added more fluid back in, then repeated the procedure.  To confirm I took the level down to 14 inches, I took my wooden dowel and measured two points on it 14 inches apart from each other.  I then used this as a dipstick to confirm I set the level correct.
I then put the valves back in.
I then figured since I had the left side cover off that I would lube the speedometer cable before putting the rotor cover back on.  If your speedometer is bouncing, this is the first thing I would do to try to correct it.  I lube my cable once a year.
There is a phillips screw that holds the cable.  Take this screw out.
Pull the cable off.  In this shot, you will see a flat piece where the cable attached.  This is what turns the cable.
Here is the bottom of the cable.  The slot on the cable is where the flat part that turns the cable fits.
Simply pull the cable all the way out of the housing, then wipe it down.
Here it is completely out.
Lube it with a good quality graphite oil
Once you have lubed the cable, slide it back into the housing.
Line the slot in the cable back up with the flat drive piece and reinstall the cable.
I decided to do one more thing, next to the alternator, there are two tubes with drain caps on them.  These tubes need to be emptied from time to time.  I decided to empty them.
Move the retainer clips up, get a container ready to catch the fluid that comes out (it's usually not much), and pull the plugs (do this one at a time).

Put the fork cap covers and rotor covers back on, then take the bike off the jack and center stand.  It is now ready to ride.
Some folks like to use 15 weight fork oil.  From what I have read, it appears most are using 10 weight.  The ride seems smooth and I am happy with the results.  I learned quite a bit from doing this job, and I hope you did also.

Talk to you soon,

Ed

Sunday, March 11, 2012

Carpe Diem and the price of gas


“Gas prices up another 12 cents in past two weeks.”  This was the headline on today’s MSN homepage.  Not exactly the news Ed and I would like to hear.  The rise in gas is not exactly news to us, it’s been the top news story for the last few weeks and it doesn’t look like it’s going to go down in the near future.    

Since we can’t control the world, how it operates, and the price of crude were taking this trip.  In other words this is not a game changer for us.  Ed and I have noticed that many people who take this trip tend to be older and of retirement age and have the time to meander up and back.  We however, aren’t 40 yet; all three of our kids are under 18 and live at home.  We’ve had to take a significant amount of vacation time from work and frankly it will take a lot for us to cancel and stay home. 

I recently traded emails with a blog reader and we talked about grabbing life by the horns, doing things when and while you can, and seizing the day!  For us this is our moment.  Sure we could wait until  we were older, retired, the kids are grown, but who is to say we’d be around, have the money, time or health to do it.  I don’t know what tomorrow will bring.  I have no crystal ball.  I do however have the time now, babysitter for the kids, and health to do it now. 

Ed and I will just have to pad our budget some more and hope for the best.  So here’s to grabbing life and taking an adventure.  In the meantime I'm going to try and be optimistic cross my fingers and hope things will somehow workout in the world.  


Saturday, February 18, 2012

Marking tasks off our list

Good morning, Ed here, thanks for stopping in to check on us.  It is a chilly morning in Oklahoma, so I've fired up the fireplace which is right next to the computer to keep warm.

That's better.
We are getting really close to having everything done and ready for the trip.  We have been actively working our planning project plan for this trip.  This morning, I have done some additional research which I will share with you in a few moments.  I would like to share with you what our project plan looks like, perhaps it may help you plan for your adventure.  The plan is in Excel, here are a few screen shots below.

This sheet has kept us very well organized during our planning stage.  As tasks are completed, they are coded in green, tasks not started are in blue, and tasks past due are red.  We wrote down every detail we could think of so we won't forget anything.
This is what our pack list looks like.  We really need to go back through this and possibly eliminate a few items.  I think we are a little heavy right now.
One of our tasks is due between 02/01/12 and 02/28/12, which is the task I am going to complete this morning.  This task is to print information about a few places we may be stopping along the way.  Of course I will make sure we have this information in our netbook, but I also want to have a just in case printed copy.  So here we go.

The first place is called Adventure Cycleworks.  Adventure Cycleworks is in Fairbanks, AK.  They primarily are a tire shop, but do also provide some limited repairs.  I don't anticipate that we will need to purchase tires on this trip as we will be leaving with a fresh set, but they do offer a place to change your oil and have a power washer you can use to wash the Dalton muck off of your bike.  They are also willing to receive packages on your behalf and hold them for you.  We are hoping to be able to store our trailer here while we take on the Dalton.  I have heard many great stories about these folks.  This is a popular stop for the ADV crowd.

Though we are not making any reservation for hotels or campgrounds, we are wanting to stop for a brief rest in Fairbanks, AK.  Hotels are extremely expensive up north, so one solution is to stay at University of Alaska Fairbanks.  The University will allow you to stay in one of the student dorm rooms.  The cost is about $57.00 per night.  This will be a great stop for laundry and a shower.

If we attempt the Dalton all the way up to Prudhoe Bay, we will need to make reservations at one of the motels up there.  We were originally going to look at staying at the Arctic Caribou Inn; however, when I went to look this morning, the web page says it is no longer in operation.  This is a big disappointment as they also operate Tatqaani Tours which is the bus ride to the Arctic Ocean.  I will have to do some additional research to see if there are any other buses that run to the Arctic Ocean (you cannot ride there as the road is not open to the public).

That being said, I will print the information for the Prudhoe Bay Hotel.  This hotel costs $120.00 per night per person, so yes it is expensive but it is the place to stay in Dead Horse.  This place features a clean room with a private bathroom as well as a 24 hour all you can eat buffet which is included in the cost of the room.  This hotel caters to the oil field workers and not tourists.  If they have room for tourists, they will take them in.  They do not allow you to make your reservations until one week prior to your arrival.  I have emailed this hotel to see if they have any information on how to get to the Arctic Ocean.  I will share this information once I have it.

Here is information on all the current Hotels in Prudhoe Bay:

Prudhoe Bay Motel
P.O. Box 340004, Prudhoe Bay, Alaska 99734
907-659-2449

Arctic Oilfield Hotel
Prudhoe Bay, AK 99734
907-659-2614

Service Area Ten Camp Hotel
Pouch 34004
Prudhoe Bay, AK 99737-0044
907-659-2377

If you are interested in a copy of our task list or a blank copy for yourself, please shoot us an email we would love to help.  Thank you for helping me to cross one more item off our list.

Sunday, February 12, 2012

Trailer tires and a plug kit

Well, not much is going on here this weekend as it is very cold in Oklahoma City. 

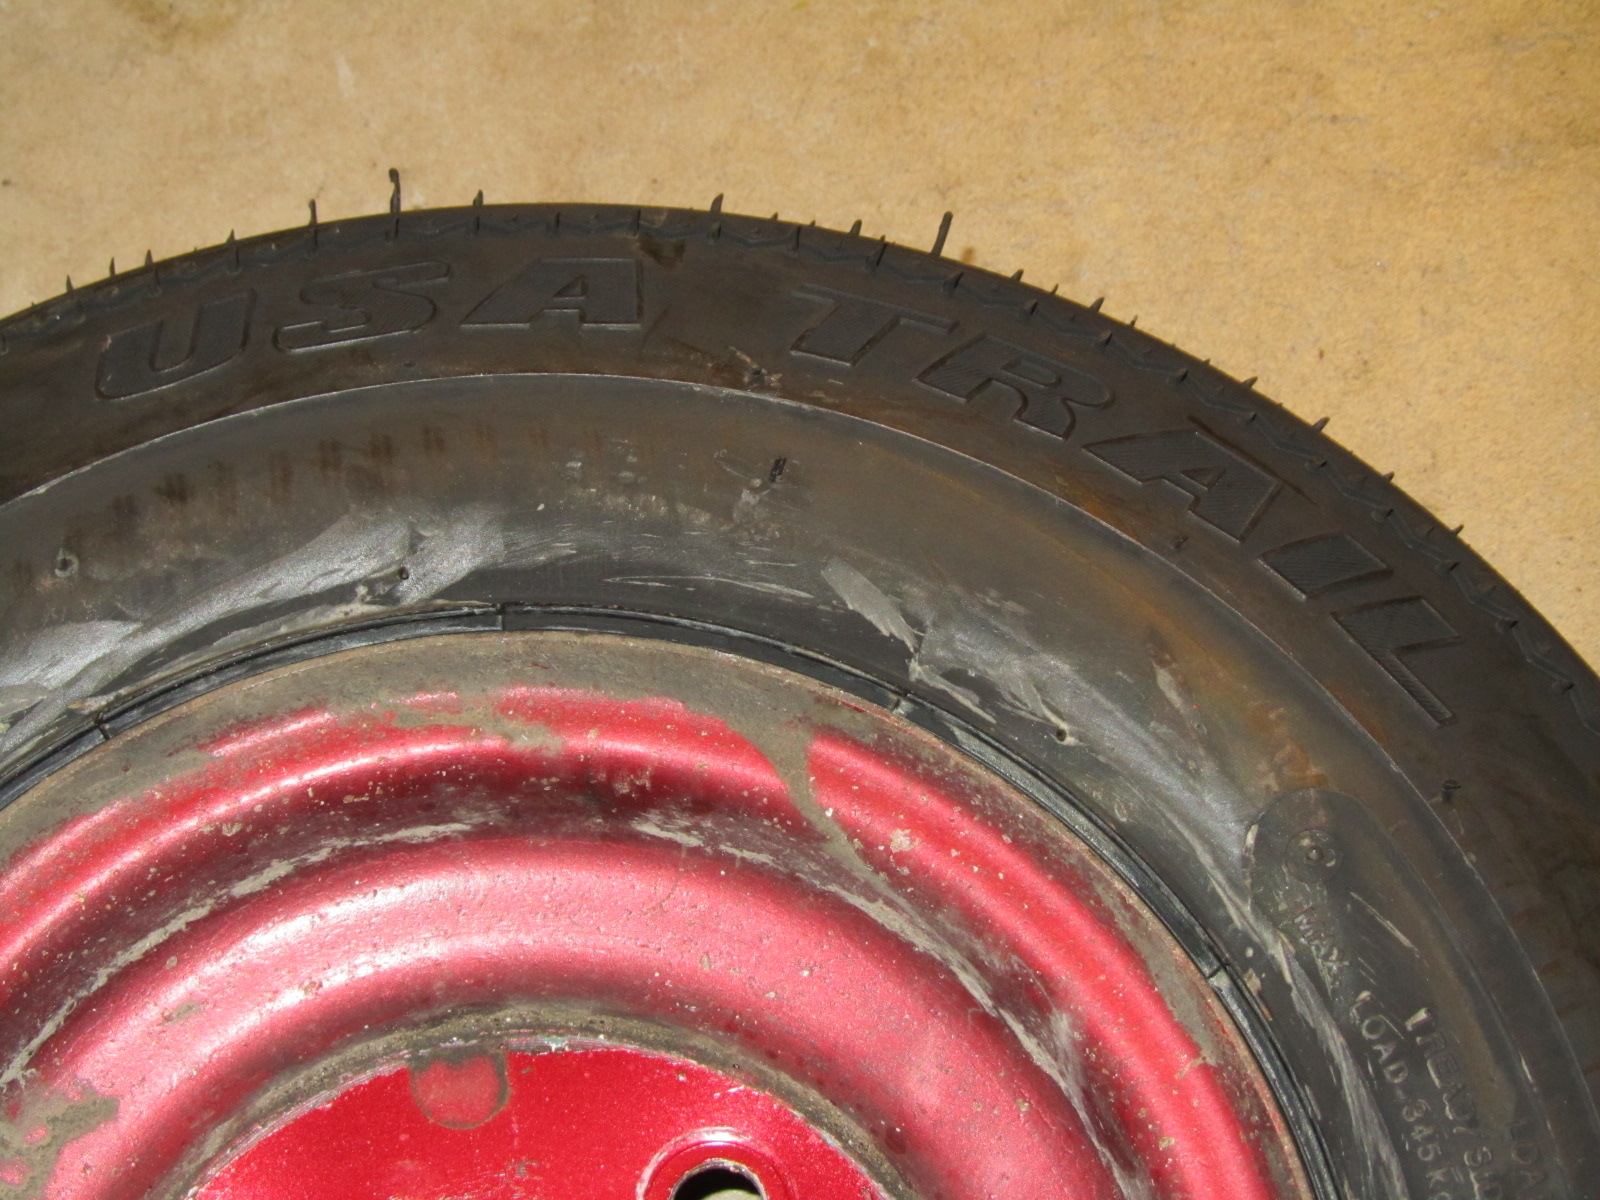
This weekend, we installed new tires on our trailer.  We were not able to upgrade the trailer tires to twelve inch rims as they were too big to fit in the wheel openings.  We wound up buying a set of Carlisle USA Trail tires. 

We went with the C rated (6 ply) to accommodate additional weight if needed.  The best price we were able to find was on Ebay, so we ordered them.  Yesterday, we brought them over to Discount Tire and had them mounted at a cost of $6.00.

These have a great new tread pattern.


Here is the wheel and tire mounted on the trailer.  We don't really like the moon caps, but for now they will do.
Since we are on the topic of tires, we also purchased a fresh tire plug kit.  We always have one in the bike along with an air compressor just in case.  For this trip, we wanted to make sure we had a fresh kit.


Talk to you soon,
Ed

Sunday, February 5, 2012

Waterproofing the bike cover, trailer tires, and more riding gear

Ed here,

A few weeks ago, I rode my Wing to work like a I do every morning.  I knew rain was in the forecast, but it did not matter.  When I got to work, I put my full bike cover on the Wing to protect it from the rain.  It rained all day.  When I came out to go home, I noticed my seat was wet.  My cover has always seeped a little when the rain is heavy because the nylon get saturated.  This made me think a little, you can bet we are going to get rained on during our ride so I started thinking about a way to improve the water beading ability of our cover to repel rain better.  I want to make sure the bike is protected as much as possible from the rain when it is parked at campsites.

Many years ago, I had a pair of hiking boots that I sprayed down with a material that caused the water to bead and roll off the boots.  I thought to myself that this could probably work great for the bike cover.  So I went looking in the garage for this can (it has been sitting in my garage for about 19 years).  I found it and decided to spray down my cover.  Water now beads up and rolls right off the cover.

I searched and searched on the internet and could not find this stuff.  This can is about 19 years old but is still great stuff.  Based on my internet search, there are many similar products out there.
I hung the bike cover from a clothes line in the garage.
I just sprayed it down and used all that was left in the can.  I let it dry for about an hour and gave it a test.  The water now beads right off the cover.
We are going to replace all tires (bike and trailer) before we leave on this trip.  Yesterday, I started looking for tires for our trailer.  The trailer currently has four bold pattern rims with 4.80-8 tires.  I was considering upgrading the wheels to accommodate 12 inch wheels rather than 8 inch wheels.  Upgrading to a 12 inch wheel would help reduce bouncing.  Unfortunately, upgrading to 12's is not an option as they would not fit into the wheel wells of the trailer.  So my task for this week is to find tires for the trailer.  I may wind up buying rims and tires because it is not that much more to buy the tires on a new rim and then I would not have to deal with the hastle of mounting the new tires.  Stay tuned.

Earlier this week, Devon and I purchased riding pants.  We have been looking for pants that are well vented, waterproof, and have a thermal liner, that way we can wear them in all conditions.  We were able to find a pair that fit the bill, the Tourmaster Venture Air Pants

The nice thing about these pants is that they are available in "short" sizes.  Devon and I are short, we both have 30 inch inseams.  The "short" pants are a perfect length.  One thing we did find with these pants are that they run a little on the small size.  I wear either a 36 or 38 inch waist depending on the pants, so I ordered the XL which is supposed to be a 36-38 inch waist.  They actually fit more like a 34-36 in waist, but I am trying to drop a few more pounds before our trip so hopefully they will be a little more comfortable.  Devon's ran about a size too small also, we have ordered an exchange for hers to the next size. 

These pants should provide a ton of flexibility for the various temperature ranges we will encounter.  With the thermal liner in, they are quite warm.  With the thermal liner out, they are a mesh pant.  If it rains, the waterproof liner can be used with the thermal liner in or out so these pants will work perfectly for all riding conditions we may encounter.  Here are some of the feature of these pants.

The Tourmaster Venture Air Pant.  The pants have two zippered pockets, hip pads, and adjustable knee pads.  The adjustable knee pads are wonderful, I found with many other pants that I was wearing shin guards rather than knee pads.
The legs are zippered and a Velcro flap covers the zipper.  Notice the shell of the pants is mesh.
Here is the waterproof membrane.  
The thermal liner.
These pants do run a little on the small side.
The waist band has adjustable straps.  When I (Ed) wear my pants, I have them on the furthest out setting.
I also wanted to get a mesh riding jacket for Devon.  This is because we are having to plan for temperatures from the low 30's to the high 90's.  I have been looking for quite some time and recently found a pair of matching mesh coats with thermal liners being sold by a member of a motorcycle forum I frequent.  The price was very reasonable for both, so I reached out to the member and decided to purchase the jackets.  I already have a mesh coat, but now Devon and I will match.  The jackets are the OSI Cool'R series jackets.  These jackets have a removable full sleeve waterproof thermal liner, so we are considering using just these coats for the trip rather than bringing our winter riding coats and mesh coats.  I figure using these in conjunction with the heated gear that we would be OK.  This would give us more flexibility with less bulk, but we will need to test it to make sure they are plenty warm.  These jackets run on the large side.  Here are some of the features.

The coats were in excellent shape.  The fellow I purchased them from said they were worn about 5 times.  They recently moved to Florida and sold their Goldwing so they no longer needed the jackets.  The jackets have pads for the elbows, shoulders, spine, and kidneys.
The waist is adjustable with Velcro straps.  The jackets will breathe nicely with the thermal liner out due to the mesh shell.
The thermal/waterproof liner.
There is a nice pocket along the left zipper.
The Kidney pad is zippered to allow for more room if needed when sitting.
These coats run on the very  large side.  I would say they wear like an XXL rather than an XL.
Well, only 117 days and counting.  The trip is really coming together.  We have been hearing from many other riders headed the same direction we are going around the same time, we hope to meet them on the road.

Talk to you next week,
Ed