
We have been receiving a bunch of feedback about our trip as well as links to other blogs and ride reports. I have created a links section to our blog page to the pages of others. Devon and I created this blog not only to share our experience, but to be a resource for others wishing to do a similar trip. We have enjoyed reading about the experiences of other riders and will update the links section as more rides are shared with us. There is a wealth of information out there and it is all great reading.
Anyway, onto the reason for this post. I feel like my motorcycle is an extension of myself, it provides me with a silent place to go where there are no cell phone, no email, and no real worries. It is a true escape. When I am on my motorcycle, I can fully understand why a dog likes to stick its head out the car window. If you ride, you know what I am talking about. I ride all year round and have not had a car now for 7 years. I ride in the heat, cold, and rain. The only time I do not ride is when it is icy out.
It has been an extremely difficult week for me. I worked a ton of hours and would come home each night to see the Wing torn apart in the garage. I missed riding it all week, so on Friday evening I turned on the tunes in the garage and started where I left off from the previous Saturday. I was not able to complete the bike on Friday evening and would finish it on Saturday morning. This job was not a real difficult job, it was just very time consuming. All in all, it took me about eleven hours to complete the job. I am fairly mechanically inclined and am familiar with the Wing, but for some reason I get slightly intimidated working on it. With cars, I have done everything from replacing motors to changing oil so I am not sure why working on the Wing intimidates me. I guess it is because it is such a well built machine that I hardly ever have to work on it so my exposure is not as great as some of the junker cars I have had in my lifetime.
I took a bunch of photos, but inevitably I missed a few. The cable replacement itself was very simple. I did not have to remove or loosen the carburetors. My procedure is outlined below, so turn your tunes on and follow me to the garage.
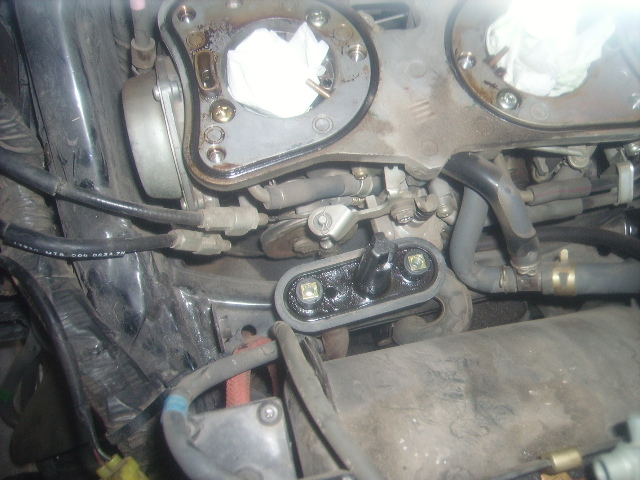
When we last left the Wing, it looked like this:

It was completely ready for the cable swap. The first thing I did was to replace the push cable. I figured it would be the easier of the two to replace, but I was wrong. Though not difficult, there were a few extra steps. I followed the cable from the throttle down and across the handlebars to the left side of the bike. It leads to a sort of junction box mounted to the frame under the left fairing by the left air duct. Here is a photo of the junction box, you can see it to the right of the air duct. Yep, that's it the piece with the cable bolted into it.

The cable bolted into it (marked with a pink dot above), is a short relay cable that goes from the box to the carburetor. I did not remove this cable. It looked to be in good shape and I did not order it with the other cables. In the front of this box, the cable to the throttle. This is the cable we need to remove. But first, we need to remove the air duct. The air duct is held in place with two screws and nuts. One is right there on the fairing, the other is deeper in the fairing, you can see it toward the front of the bike near the handlebars. Unfortunately, I was so focused on getting the vent out that I forgot to take a photo but this part is fairly straight forward.
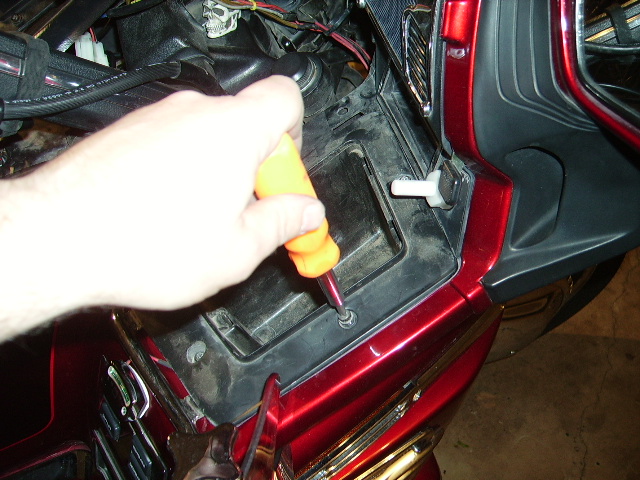
Our next step is to take the cover off the push cable relay box. Hey, can you hand me that screwdriver?

I accessed the cover screw through the side marker hole in the fairing. When you take the cap off, you can clearly see the relay. We can also see the cable we are after in this photo. It is in the front of the box, if you look closely, you can see it has a blue dot on it. There is a little rubber grommet on the inside of the relay box around the cable from the throttle. This grommet has to be removed, but has to be done when the cable is disconnected. To disconnect the cable, I unbolted it from the front of the relay box. I then rotated the plastic piece where the cables attach to give some slack, then used a small dental pick to unhook the cable. Here is a photo I took of the relay straight on, this is a view through the side marker lamp hole in the fairing, it shows the cable unbolted but still hooked to the plastic relay.

Here is the cable disconnected from the relay, sorry for the blurry picture I'm not very coordinated, so it's hard to do this one handed:

I then unhooked the push cable from the throttle and pulled the cable out, threw it on the ground and did a victory dance. Installation was the exact opposite including another victory dance. Unfortunately, I did not get any photos of the installation, but here is a tip, don't forget the little rubber grommet inside the relay box otherwise you will have the opportunity to perfect this procedure by doing it a second time when you look down and see the piece sitting on the garage floor (I lost about 15 minutes there). Yee Ha, one cable down, one to go!
Our next focus will be on the pull cable removal. I had a few folks recommend the following tools for this project; an 11 inch set of straight needle nose pliers, an 11 inch set of 45 degree needle nose pliers, an 11 in set of 90 degree needle nose pliers, and a 10 mm crowfoot wrench head that could go on a socket wrench. I did not use any of the needle nose pliers, but new tools are always welcome in my tool box. That is part of the reason I like doing my own repairs, it gives me an excuse to buy more tools! Anyway, without the 10mm crowfoot wrench I suspect I would have had to loosen and tilt the carburetors to be able to gain access to the nut at the end of the cable near the carburetor.

This picture shows the crow foot wrench on the nut at the base of the carburetor. Once it is loose, you can pop it out of the mount. Here is another tip, when removing your crow foot don't pull strait back, it will fall off the end of your socket extension and you will wind up fishing for it with a magnet for about 30 minutes. You will eventually find it, but will need a short 15 minute break afterwards. Here is the cable unbolted and detached from the mount:

The next step is a little tricky. You have to rotate where the cables connect to create slack so you can disconnect the cable. The reason why this is tricky is because there is very little room. Here is how I did it.

I used a flat-head screw driver to rotate the cam all the way over. This created enough slack for me to remove the cable from the cam with a needle nose pliers (a regular set, the 11 inch ones were too long). I would have loved to get a photo of this for you, but I was not able to. Be very careful not to hit the vacuum line next to the cam with the screw driver. I don't know what that line does, but I'm sure you would not be happy if you ruptured it.

Here is the cable removed. From here, I pulled it out through the fairing, unscrewed it from from the throttle on the handlebar, threw it on the ground, and did yet another victory dance. Phew, I'm out of breath, time for a Coke.
Installation was the exact opposite of removal. The only difference was that I did not use the needle nose pliers to reinstall the cable on the cam as I did not want to risk damaging it. I used my fingers. This took some patience and a little time, but it was not hard at all. Here is what the new cable looked like installed:

Here is how the cables routed under the handlebar:


I hooked the cable ends up to the throttle tube at the handle bar and screwed the cable end retaining nuts back into place. Here is what it looked like once I bolted the throttle back together.

The next step was to adjust the throttle.

On the pull cable, there is a rubber boot. When the boot is pulled back, there is a jamb nut and an adjusting nut. To adjust the cable, release the jamb nut and adjust the adjusting nut. I set my throttle to about 1/8 inch of play. We will see how that goes and re-adjust if necessary.
Next, I attempted to fire the beast up but she would not fire. I spent about another 30 minutes trying to figure out why. I focused on the reverse lever because the reverse light was on on the dash. Silly me, it turned out I bumped the kill switch on the top of the throttle to the off position. I switched it back to on and she fired right up. I checked the operation of the cables, and they were working perfectly. This time I did a happy dance!
At this point, I look around the garage. There were tools laying everywhere and it looked like a Goldwing parts explosion happened in there. I thought to myself, "sure hope I don't have any left over parts when I am done". Well time for reassembly, if you need to take a short break I understand. I'll be here when you get back.
The first step was to put the cap back on the push cable relay box, I need that screw driver again please. After getting the cap back on, I placed the vent tube back into the fairing and bolted it back in place.

Now was the time for the step I was dreading the most. Surprisingly it was not that difficult.
I ratcheted the small plastic piece that screws to the bottom of the air filter box back to its hoses.

I then set the air box back in place and re-attached the green stripped and pink stripped vacuum lines to the left side of the air box. Now was the hose I was dreading the most, the large one on the bottom of the air box. This is extremely difficult to get to. I read on line to use the 11 inch pliers to reach the clip and mount the hose to the bottom of the air box by approaching it from where the front of the seat would normally be. This did not work for me. After about 45 minutes of messing around, I decided to pull the right fan. To see if I could access the hose from the underside.

Well hot diggity dog, there is the hose. It is the hose with the dark green stripe on it. I was able to move the clamp on the top side of this hose to its normal position, then push the hose on to the nipple on the air box from underneath through the fan opening. I double checked that the retainer clip did not slip down as I pushed the hose onto the nipple. Everything was secure and in place. I reinstalled the fan, sorry I forgot to take photos of the fan removal and installation as I was very focused on getting the hose hooked back up.

I screwed the six screws in the air box to the top of the carburetor and the two screws that secure the plastic piece noted earlier that screws to the bottom of the air box.

I then bolted the air box back to the frame on the right and left sides. There is a green plug with wires on it that plugs into the front right of the air box, plug it back in. It now was time to put the air filter back, so I placed it in the box and screwed the box shut with the necessary screws. I also put the cold air intake back on the front of the air box.
Now, let's put the body work back on.

Up first is the right side shelter. This piece is held in place with two screws and a nut.

I placed this piece on the bike, there is a tab that goes on a stud near where the front of the seat is. When placing this piece back on the bike, do not forget to plug the wires for the air pump back in place. I placed the nut back on. It is not necessary to put the nut back on at this point because you will only have to take it off again to install the top shelter. I put it on so I would not loose it.

I secured the screw which attaches the panel to the fairing.

Next, I installed the screw at the back of the panel. This screw has a stud on it which holds the grommet for the side cover when the side cover is installed.

The next piece to go on is the front right lower cover. When installing this piece, make sure to plug the lights back in. The very first time I removed this piece, I forgot to do this and had to take it apart again to plug the lights back in.

This piece has a little nub and two small extensions at the bottom that snap into the lower cowl. There are three screws that fasten the panel to the fairing near the side marker light.

Here are the screws and the chrome piece that covers the side marker lamp. Just line up the screws and tighten them down.

Next is this trim piece, it simply snaps in place and covers the upper seam of the fairing. Here is what it looks like installed:

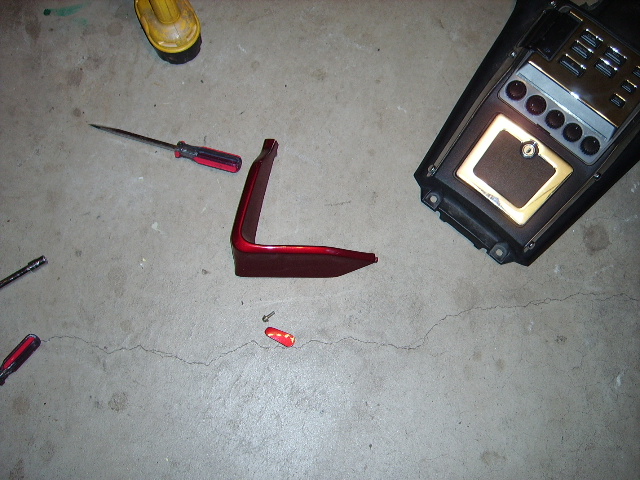
Next is this little L shaped piece and screw cover. It fits below the fan.

Simply slide the tabs into the holes on the lower fairing cover and side shelter cover and screw it in place.

Then put the screw cover back in place.
Cool, the right front side of the bike is done. Let's move to the left side.

Time for the left side shelter to be installed. It goes on the same as the right side with the exception of the reverse lever.

Make sure to plug the CB in when installing the shelter cover. The next few photos show the installation of the shelter.


Next is the installation of the reverse lever. It screws back in place, you then need to slip the rubber cover back onto it.


The lower fairing cover, seam piece, and L shaped piece go on the exact same as they did on the right side.


The three tabs at the bottom fit into the cowl and there are two grommets on the inside of this piece that fit over studs under the radiators.

It pops in nice and easy. Now the front and front left side are done. Time to focus on the top.
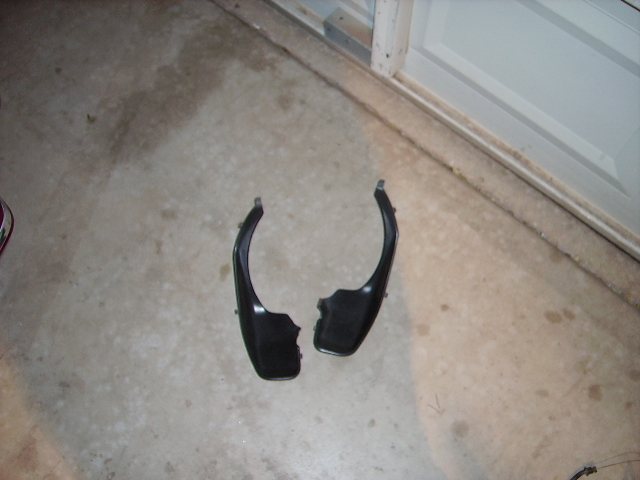
The next series of photos show the installation of the wind wings, fairing pockets, and foot vent control knob. Do not make the same mistake I did and install the fairing pockets at this point, they should be installed after the top shelter and radio are installed. I had to take them back out before putting the top shelter back on loosing another 15 minutes.


 |


Here are the wire connections for the stereo on the bike and what it looks like when installed.


Next, there are two white plastic clamps that you push on to lock down the top cover. Also, those nuts that we put on so they would not get lost earlier screw down at the back of the top shelter.


The key surround, plastic fillers, and pocket covers are put back on.


Next are the seat, side covers, and carburetor covers.


One last look around the garage, no extra parts laying around. Awesome!!
The final step is to get a nice kiss from my wonderful wife.

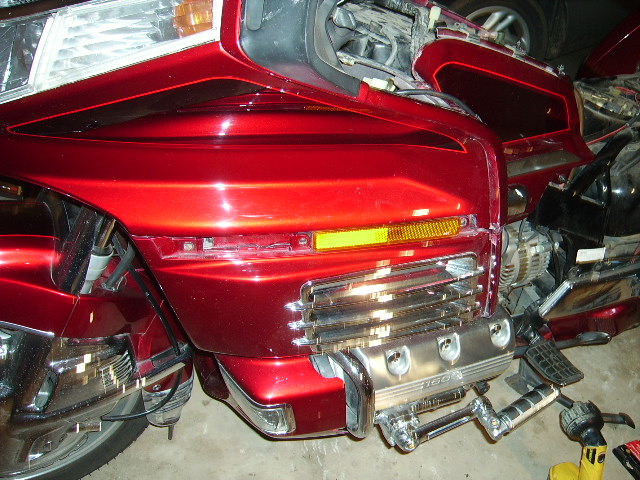
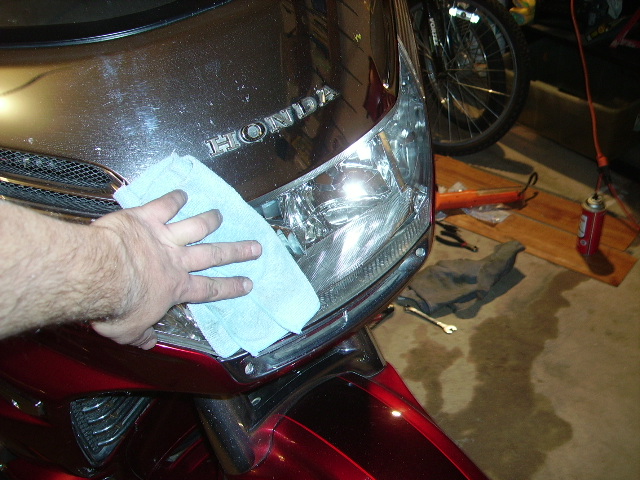
I also installed a head light guard to protect the headlight from rocks.

The Wing is back on the road, and all is good in my world again. Though this job took a long time to complete, I want to emphasize that it is not a hard job. Thank you for taking the time to read my posting.

Excellent. Great tutorial for people to look at, not just for what you were doing, but to show that once you tear the tupperware off its just anatomy and physiology.
ReplyDelete